Making your own Easter egg spring wreath is a fun and easy way to get into the season’s spirit. I absolutely love how this one kind of reminds me of miniature chocolate eggs and candy grass. After making this wreath, not only will you will have a beautiful piece to hang on your front door, but you’ll also be so proud that you created it yourself! This article will show you how to craft a super cute spring DIY wreath.
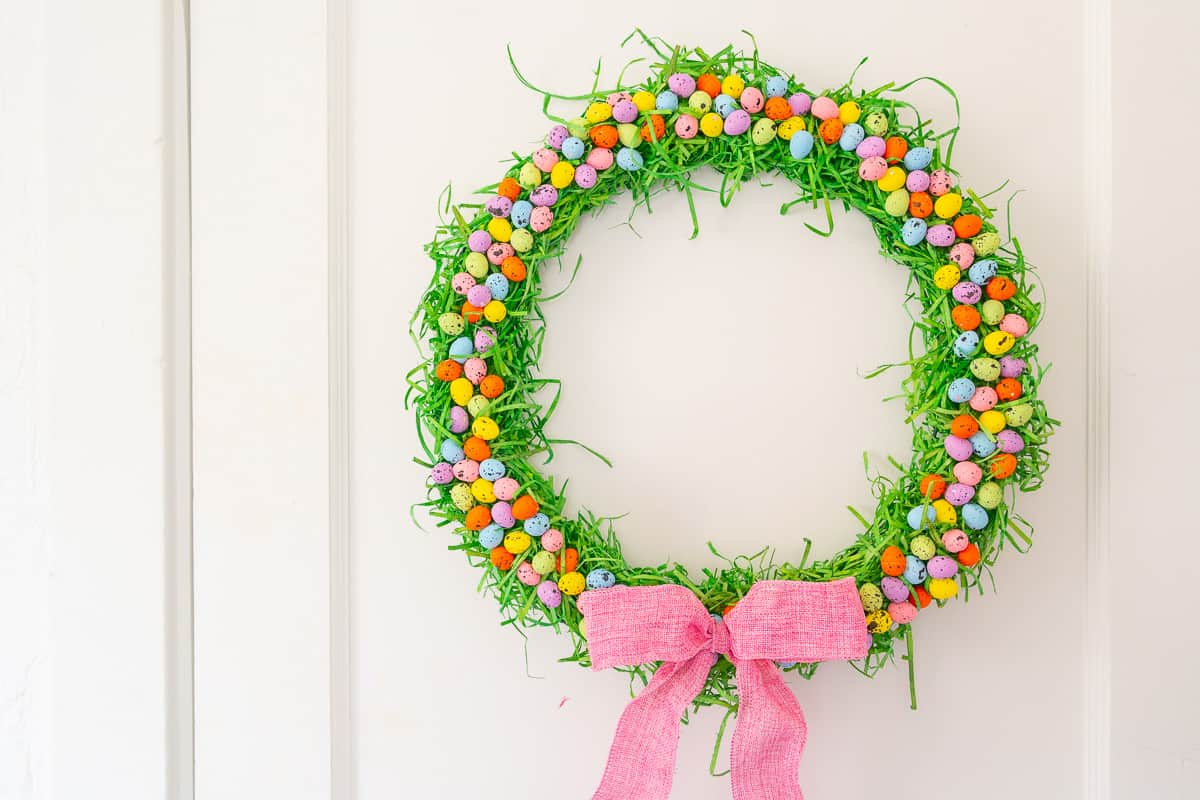
Spring is quickly approaching, and all of your thoughts are on it (me too!). Whether you’re still fighting snow or wearing flip-flops, get a head start on decorating your door with this Easter Egg Spring Wreath DIY. It’s a simple spring wreath that’s sure to make your guests smile. When spring arrives, you’ll be thrilled that you have already completed this adorable wreath!
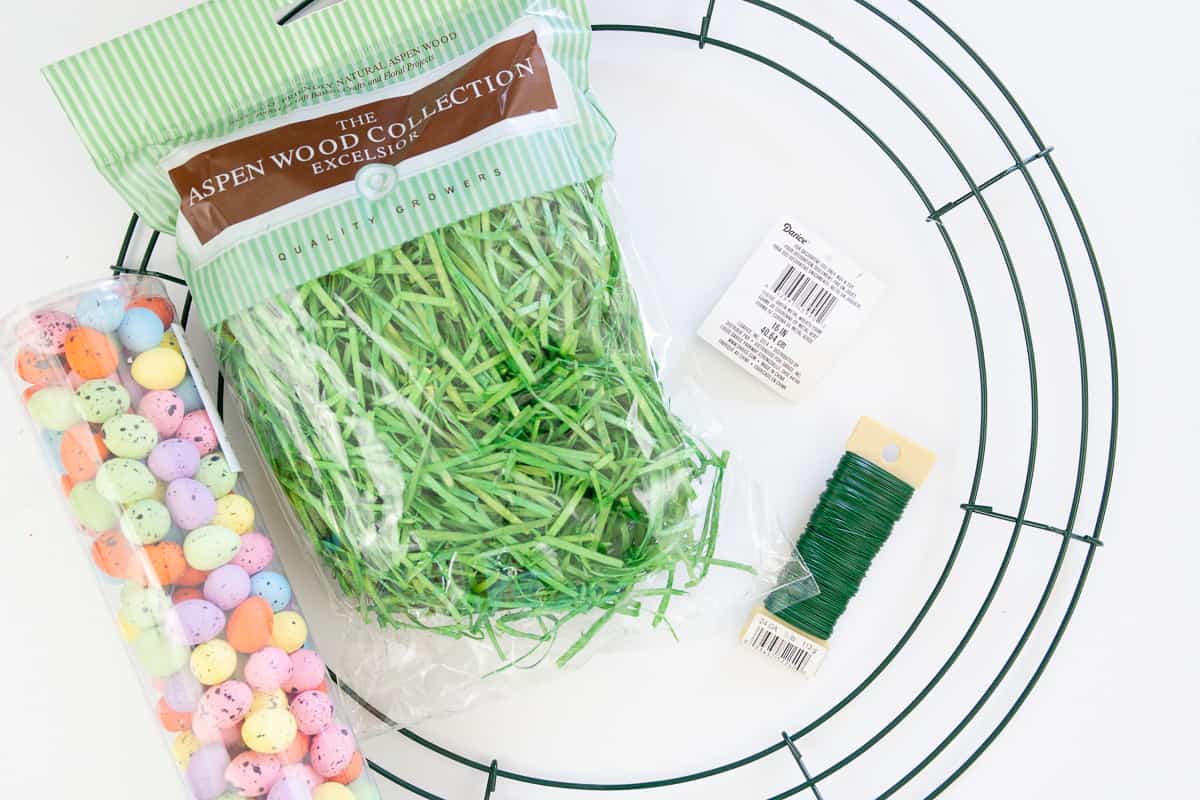
Supplies needed to make a Spring Wreath
- 16-inch Metal Floral Wreath Form (or foam wreath form)
- Kelly Green Floral Filler
- 22-Gauge Green Floral Wire
- (2) Packs Mini Speckled Pastel Eggs
- Heavy Duty Hot Glue Gun
- Pink Ribbon
How to Make Easter Egg Spring Wreath
- Begin by filling the concave side of the wire wreath with large clumps of kelly green excelsior. Wrap the wreath with green floral wire, securing the grass in position. Continue until you’ve wrapped all of the wreath. Don’t worry if it looks like the grass isn’t as secure on the wreath; you’ll be adding tons of hot glue with eggs. Can’t find wood grass? You can also use moss as well.
- Glue a speckled egg to the wreath’s back and hold it in place until secure. I wanted to ensure that I hid the green wire, so I first added eggs to those areas.
- Fill the wreath with eggs until you’re satisfied with the look. I’m going to forewarn you that this step takes a long time, but it’s well worth it for those nice full effects and coverage. You may either work on this wreath one section at a time over the next few weeks or watch a movie and finish it in one shot.
- If you’re not sure if you’ve used enough eggs, hold the wreath against a wall to double-check for any bald spots. If necessary, add a few more eggs!
- Make a bow from a 30″ length of ribbon, if necessary. This lovely pink ribbon is from Dollar Tree!
- Use the hot glue gun one more time to secure the ribbon in place. Take extra care with this step since the hot glue is scorching and travels quickly through the thin ribbon material!


Printable Instructions for Spring Wreath DIY
Easter Egg Spring Wreath DIY
Supplies:
- 16-inch Metal Floral Wreath Form (or foam wreath form)Kelly Green Floral FillerPink Ribbon
- Kelly Green Floral FillerKelly Green Floral Filler22-Gauge Green Floral WirePink Ribbon
- 22-Gauge Green Floral Wire22-Gauge Green Floral Wire(2) Packs Mini Speckled Pastel EggsPink Ribbon
- (2) Packs Mini Speckled Pastel Eggs(2) Packs Mini Speckled Pastel EggsPink Ribbon
- Heavy Duty Hot Glue GunPink Ribbon
- Pink RibbonPink Ribbon
Instructions
- Begin by filling the concave side of the wire wreath with large clumps of kelly green excelsior. Wrap the wreath with green floral wire, securing the grass in position. Continue until you've wrapped all of the wreath. Don't worry if it looks like the grass isn't as secure on the wreath; you'll be adding tons of hot glue with eggs. Can't find wood grass? You can also use moss as well.
- Glue a speckled egg to the wreath's back and hold it in place until secure. I wanted to ensure that I hid the green wire, so I first added eggs to those areas.
- Fill the wreath with eggs until you're satisfied with the look. I'm going to forewarn you that this step takes a long time, but it's well worth it for those nice full effects and coverage. You may either work on this wreath one section at a time over the next few weeks or watch a movie and finish it in one shot.
- If you're not sure if you've used enough eggs, hold the wreath against a wall to double-check for any bald spots. If necessary, add a few more eggs!
- Make a bow from a 30" length of ribbon, if necessary. This lovely pink ribbon is from Dollar Tree!
- Use the hot glue gun one more time to secure the ribbon in place. Take extra care with this step since the hot glue is scorching and travels quickly through the thin ribbon material!
Customizing Your Spring Wreath
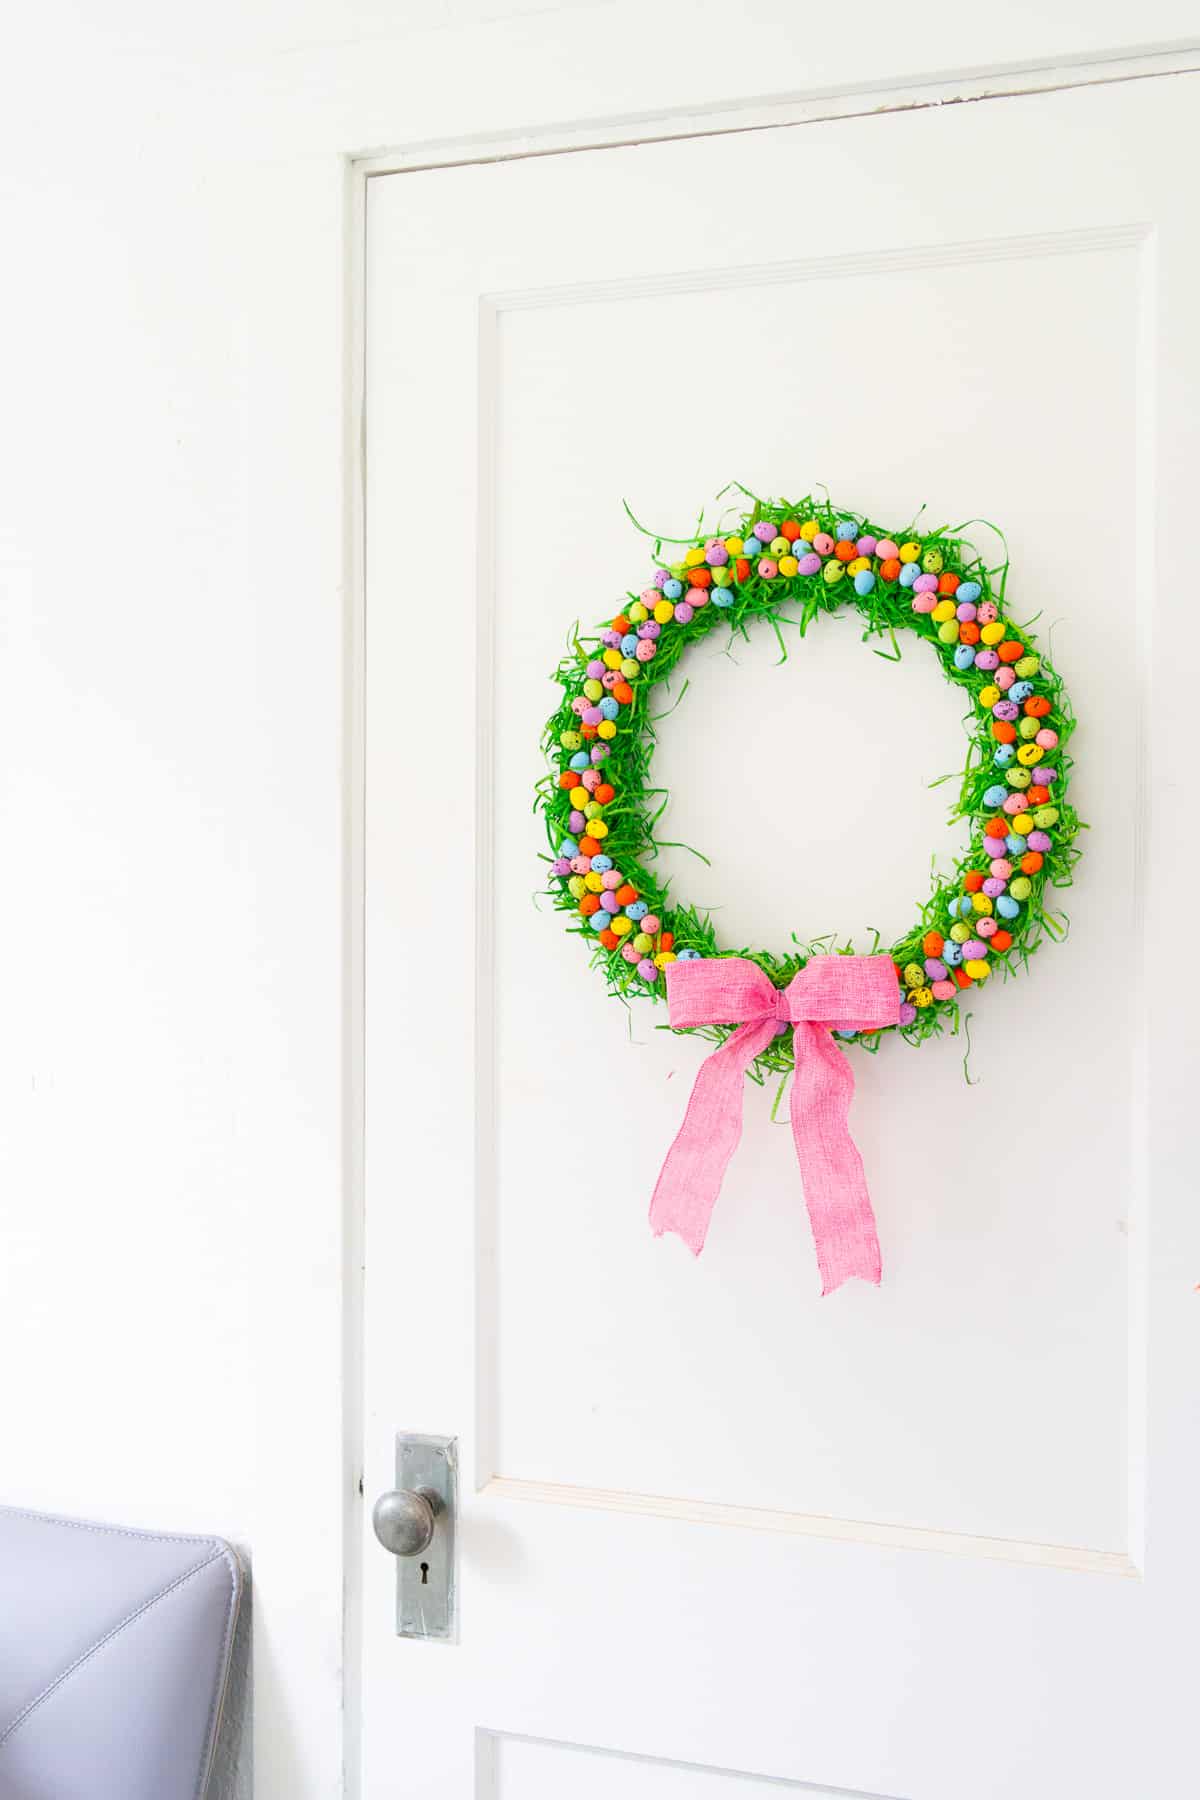
As soon as the ribbon glue has hardened completely, you can hang your adorable DIY Easter egg wreath! I highly recommend hanging it indoors or on a covered porch since the grass may not hold up to the test of nature. Of course, there are tons of ways to customize this spring wreath to make it your own.
- You could always add some florals or greenery to make it look more natural.
- Or use a grapevine wreath as the base and a burlap bow for a more rustic look.
- Add some cute details for a felt flower wreath
- Cut paper tulips or daisies to add
- and so many more ideas based on your inspiration!
More Spring & Easter Projects
Whether you’re looking for bunny baskets or more DIY spring wreath ideas, I’ve got tons of cheery and bright projects to enjoy!
- Hello Spring Free SVG & Printable
- Spring Butterfly Wreath DIY
- Easter Bunny Carrot Plate
- Peep Easter Wreath Tutorial
- Easter Bunny Wreaths
I love how fun and spring-y this wreath will look on my door without having to use faux flowers. I hope you enjoy making your own festive speckled DIY Easter egg wreath!
I hope you enjoyed the spring wreath DIY instructions that we shared in this article. Making it is straightforward and only takes a couple hours, but I recommend creating a nice complete look for the eggs. Add these speckled spring-time decorations to your home, and enjoy the season!


Leave A Reply!